You might not think of cycling as a technique or skill-heavy sport. (Before I picked up the sport, I know I didn’t; I was once an elite-level figure skater, in which technical jumps and spins were an integral part of a four-minute performance.)
However, there is plenty of technique and skill needed to ride well, especially on loose surfaces like gravel and dirt roads. With those skills comes better performance and improved safety—which leads to more enjoyment on the bike.
When you know how to handle your bike, you will have improved balance, be able to confidently venture off-road and corner on a variety of surfaces, hold a line, and modulate your brakes to safely and swiftly maneuver around myriad obstacles.
The best way to improve these skills is to ride more, of course, particularly on more challenging terrain in order to encounter more and more situations.
The numerous coaches, pros, and athletes I spoke with for this article all emphasized the importance of spending time on the bike to improving these critical skills. Malcolm Gladwell popularized the idea that achieving excellence in any field requires 10,000 hours of dedicated practice. So, if you already track your power and heart rate data, perhaps you should add total riding time to your spreadsheet of cycling metrics.
Here are some lessons for gaining the most critical skills for gravel cycling as you log those 10,000-plus hours of riding time.
Cornering on gravel
If you’ve been a cyclist for more than a few months, you’ve likely heard of “road rash.” Maybe you lost some skin, and you learned about Tegaderm the hard way. Crashes can be a part of cycling, and corners are where they most often occur. High speeds and loose gravel trails can make for challenging conditions. But that doesn’t mean you should ride in fear.
The physical training you do to get faster and perform better in races should be paired with skills practice—for two reasons. First, skills like cornering will help you to be more confident, which will lead to more enjoyment.
Second, the more you can conserve energy during a race, instead of just spending it by catching up to people after every corner, the faster you’ll be. (If you can take every corner one second faster, it’s easy to calculate how that adds up over the course of a long race.)
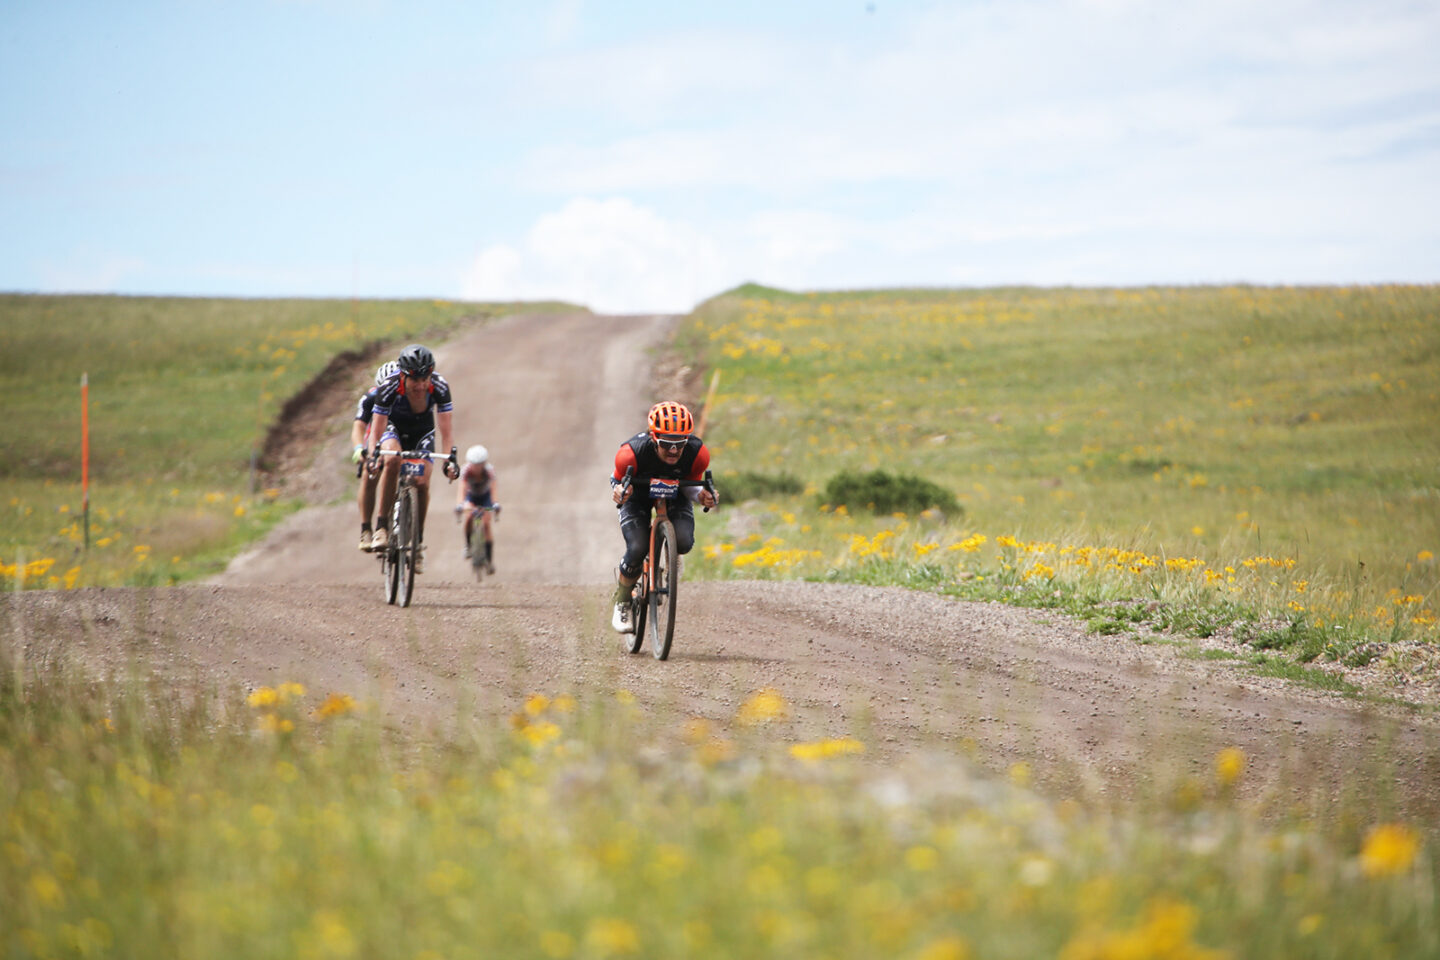
As a new rider, I initially gravitated toward riding in the hoods (above the brake levers); I mistakenly believed that position was more comfortable and safer. However, when it comes to optimizing bike handling and control, there are times when you need to ride in the drops—the curly part of the bars.
This helps in several ways. For one, you can get into a lower position, which reduces wind resistance—hello free speed! Plus, it lowers your center of gravity, which gives you more leverage and control of the bike.
Particularly on gravel, it’s important to be able to assess and adjust your cornering speed based on the type of terrain you are on. Whether you’re negotiating a section of “washboard” or ruts, big rocks or kitty litter, the terrain will dictate your speed and approach to the corner.
It’s also necessary to talk about traction and tire pressure when discussing cornering. Riders are tempted to believe that harder tires always mean more speed on the bike. Not so.
“Gravel isn’t smooth,” says pro mountain biker and gravel racer Hannah Finchamp. “It’s bumpy—even a smooth gravel road is bumpy. By lowering [tire] pressure, you absorb a lot more of the bumps, and instead of feeling the washboard effect, you’ll just float over it. Lower tire pressure is not only going to give you more traction in the corners, it will be faster rolling in the long run.”
If you run your tires at a lower pressure, they’ll have more give and your bike will be able to absorb more of the impact of the rutted surface. With lower tire pressure, you effectively create a bit of suspension, which is both faster and saves you energy.
Pacing tips and strategies
When it comes to pacing your race effort, the first decision you should make is how hard you want to go at the start. If you have a good sense of your fitness level and the demands of the event, you can gauge your effort appropriately. For instance, if you’re trying to stay with the lead pack, but you’re riding at or above threshold for four to five minutes, you’re going to crack well before the end of the race.
If you are trying to win the race, you might take a different approach.
“I like to shoot from the hip,” says WorldTour roadie turned gravel racer, Ted King. “Charge out of the gate. Try to find a good fast group that you’re comfortable with all the while monitoring, ‘How hard am I working? Is this sustainable? Is this maintainable?’ Chances are it won’t be. But that’s the case for virtually everybody, because at the beginning of a race, everybody’s excited and everybody’s sprinting out of the gate.”
It takes practice to develop an awareness of your rate of physical exertion and an understanding of how long you can sustain a given pace.
You can begin to learn your limits by testing them. The different physiological testing methods are outside the scope of this article (see Fast Talk episode 89 for more), but knowing a few pieces of data—for example, the number of watts you produce for a given timed effort or your training zones—can be assessed with mathematical formulas or laboratory equipment. With the right knowledge, you can begin to develop the most effective training strategy for your body as well as a gauge for pacing during the race.
As a simple example, a race that will last less than two hours should be addressed differently than longer races that last more than three hours. Generally speaking, most gravel events are on the longer side, so pacing becomes a bit simpler.
“Stay below threshold, around tempo,” Finchamp says. “You might get up into sweetspot on some of those harder sections, and on climbs you’re probably staying in high aerobic or tempo.”
But, overall, a sustainable pace is the best rule of thumb for races of that length.
During the race, there are a few things you can do to ensure you stay on your maximal race-pace. Check in with yourself at short intervals, maybe every 5 to 15 minutes, depending on the length of your race and your goals. Ask yourself a few simple questions: Can I sustain this pace for the remainder of the race? Can I go faster? Should I go slower? Check this against your power of heart rate information for even more validation of what your perceived effort indicates.
“[In the] first five minutes of a race, you’re probably going to be in every single zone,” King says. “You’ll be coasting, and you’re also going to be sprinting as hard as you can. [Keep] a conscious, overarching awareness of what is sustainable. If you find that you’re riding at zone 5, your VO2max, for many minutes at a time, that probably means you’re overextending yourself, and it’s going to bite you in the butt.”
Know the course
Knowing the details of a racecourse is key for a successful race. Three-time Olympic time trial gold medalist Kristin Armstrong highlighted the importance of understanding the minutiae of your racecourse in Fast Talk episode 154.
“We always replicated the course that [we were preparing for on a course where I live] in Boise. Always,” she says. “Every time trial I did, we had a course in Boise that pretty much matched it. That’s how we trained.”
While an Olympic-level athlete can go to every length in the pursuit of a gold medal, chances are you might not have the opportunity to do as much reconnaissance. However, you can still prepare beforehand by pre-riding the first and last five miles of the course, for example.
“[This] will allow you to see a little bit of what the terrain is like,” Finchamp says. “It also allows [you] to see those first five miles when it’s going to be super hectic with so many people, and then the last five miles, when you’re exhausted and maybe not seeing quite straight—or if you’re racing for a place with someone, you need to know what’s coming up.”
Beyond understanding the first and last five miles of the course, you should study the course map to learn what to expect. Learn where the big climbs are, so that you can incorporate this into your pacing strategy. Ask friends who may have raced the course before or do research online to understand everything from where the aid stations are to how chunky the gravel is. This will help you both with pacing and with gear selection.
Practice your pack riding
If you don’t have experience racing or riding in a group, practice bumping shoulders and wheels with other riders. Getting more comfortable riding in a pack is critical to an enjoyable experience and a safe performance.
“When we make contact [or come close to another rider], our brain says, ‘I’m going down,’ and then we panic, and we crash,” Finchamp says. “But if we can teach our brain that contact doesn’t mean crash, you’ll stay calmer, and you’ll have better handling.”
To simulate a mass-start, elbow-bumping situation, practice riding close with other (consenting) riders out on group rides. Ride side by side, front and rear. King recommends asking a friend or two to meet up 10 minutes before a group ride to practice bumping into each other and staying upright.
Skills drills for solo riders
What if you don’t have anyone to ride with? Practice holding your line while out on your own. How smooth and steady can you be? Ride in the drops, the hoods, and the tops. Be comfortable and confident in all positions on the bike. Give yourself micro-challenges while on a ride.
If you know your course, have done your training, and are entirely comfortable in your ability to handle the bike, you’re well on your way to tackling a gravel race.